
Today I’ll be teaching you how to use a Messenger bot to automatically gather and push customer data to your existing CRM.
It’s a fun, efficient solution to qualifying and segmenting new leads – eliminating the need to hire a virtual assistant to manually transfer user data from Messenger to your database.
You can also retarget bot users with information and future promotions. Plus, the average open rate for Messenger broadcasts is between 60-100% right now.
In this tutorial, I’ll build a Chatfuel demo bot for a real estate agent. The bot will determine if the prospect is a buyer/seller, capture their email, then create a new entry for the lead in Active Campaign.
(NOTE: This method also works with MailChimp, Infusionsoft, Constant Contact, HubSpot CRM, and many more.)
Step #1: Build your Messenger bot sequence in Chatfuel
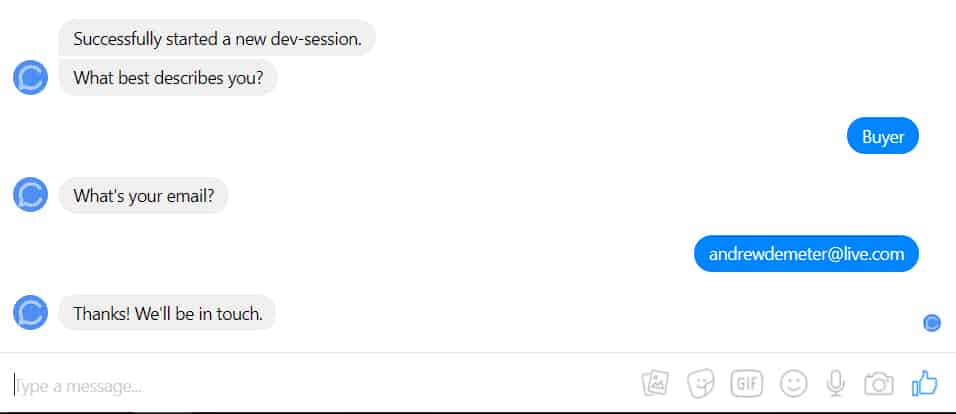
I’m simply using text and quick reply buttons to ask the user whether they’re a buyer or seller. We’ll store each user’s quick reply choice to the user attribute {{user type}} for later use.
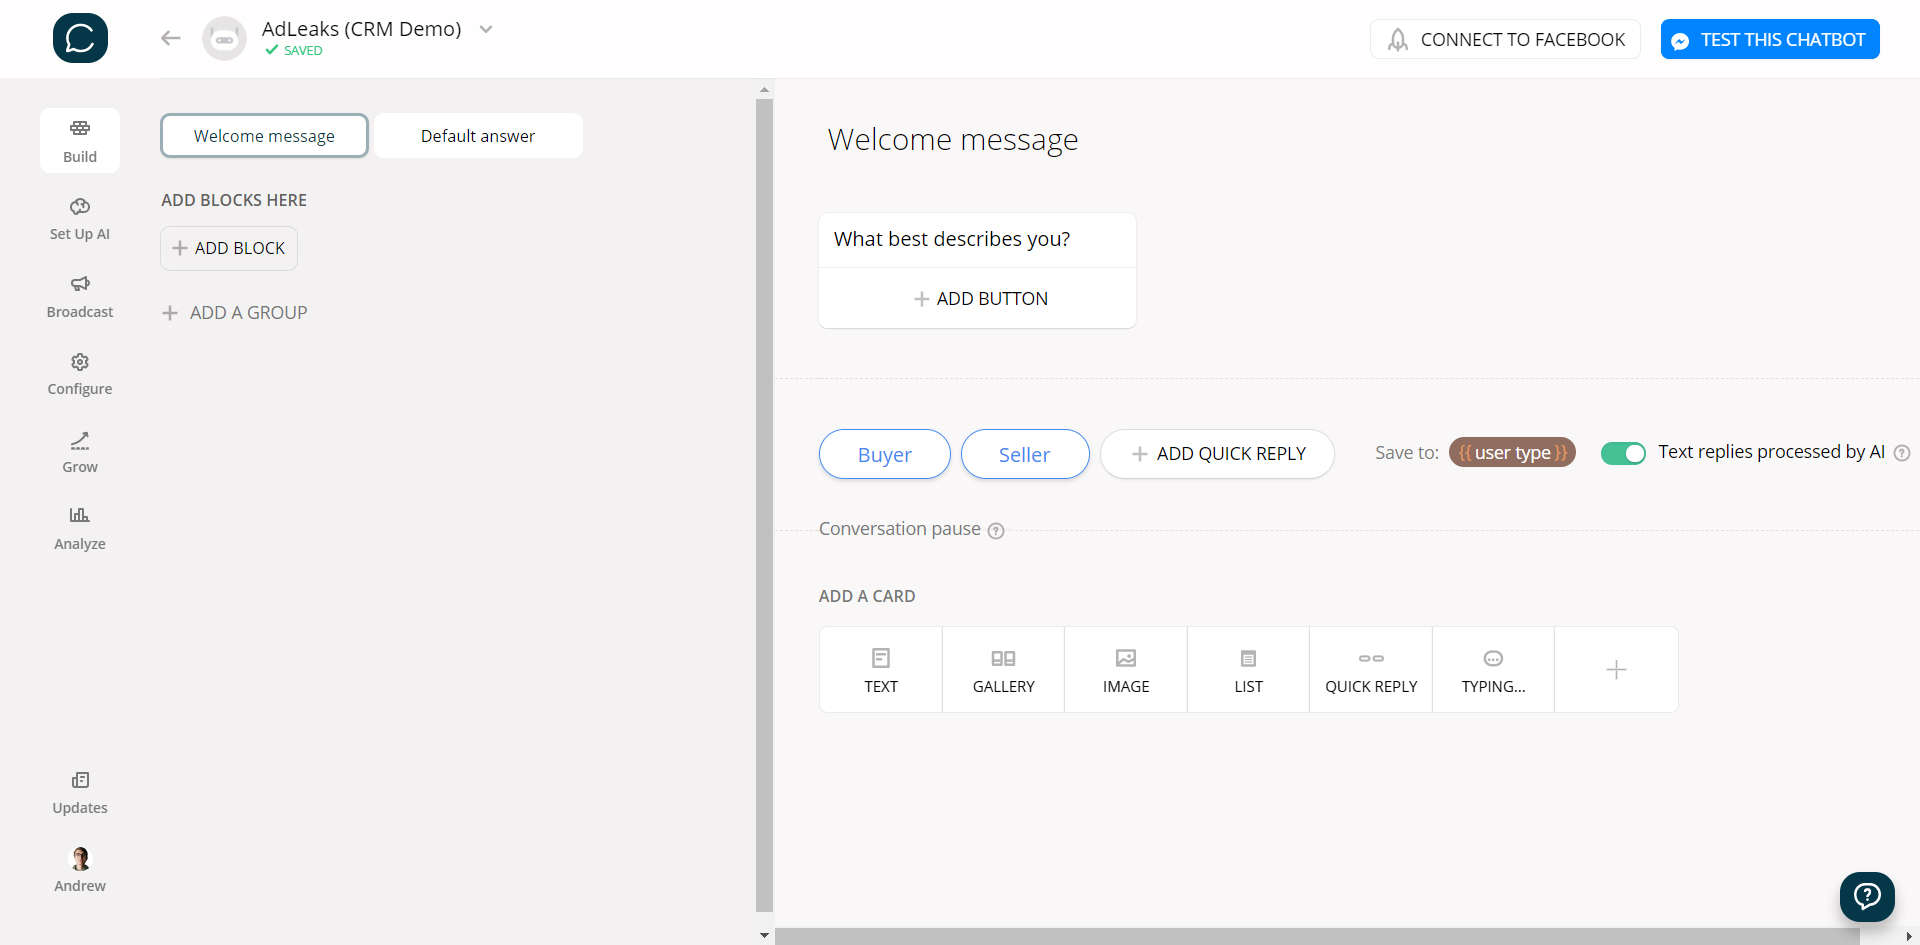
Also, it’s important to collect each user’s email address. (We are syncing with Active Campaign after all, right?!)
To do this, let’s add a USER INPUT plugin under the quick replies.
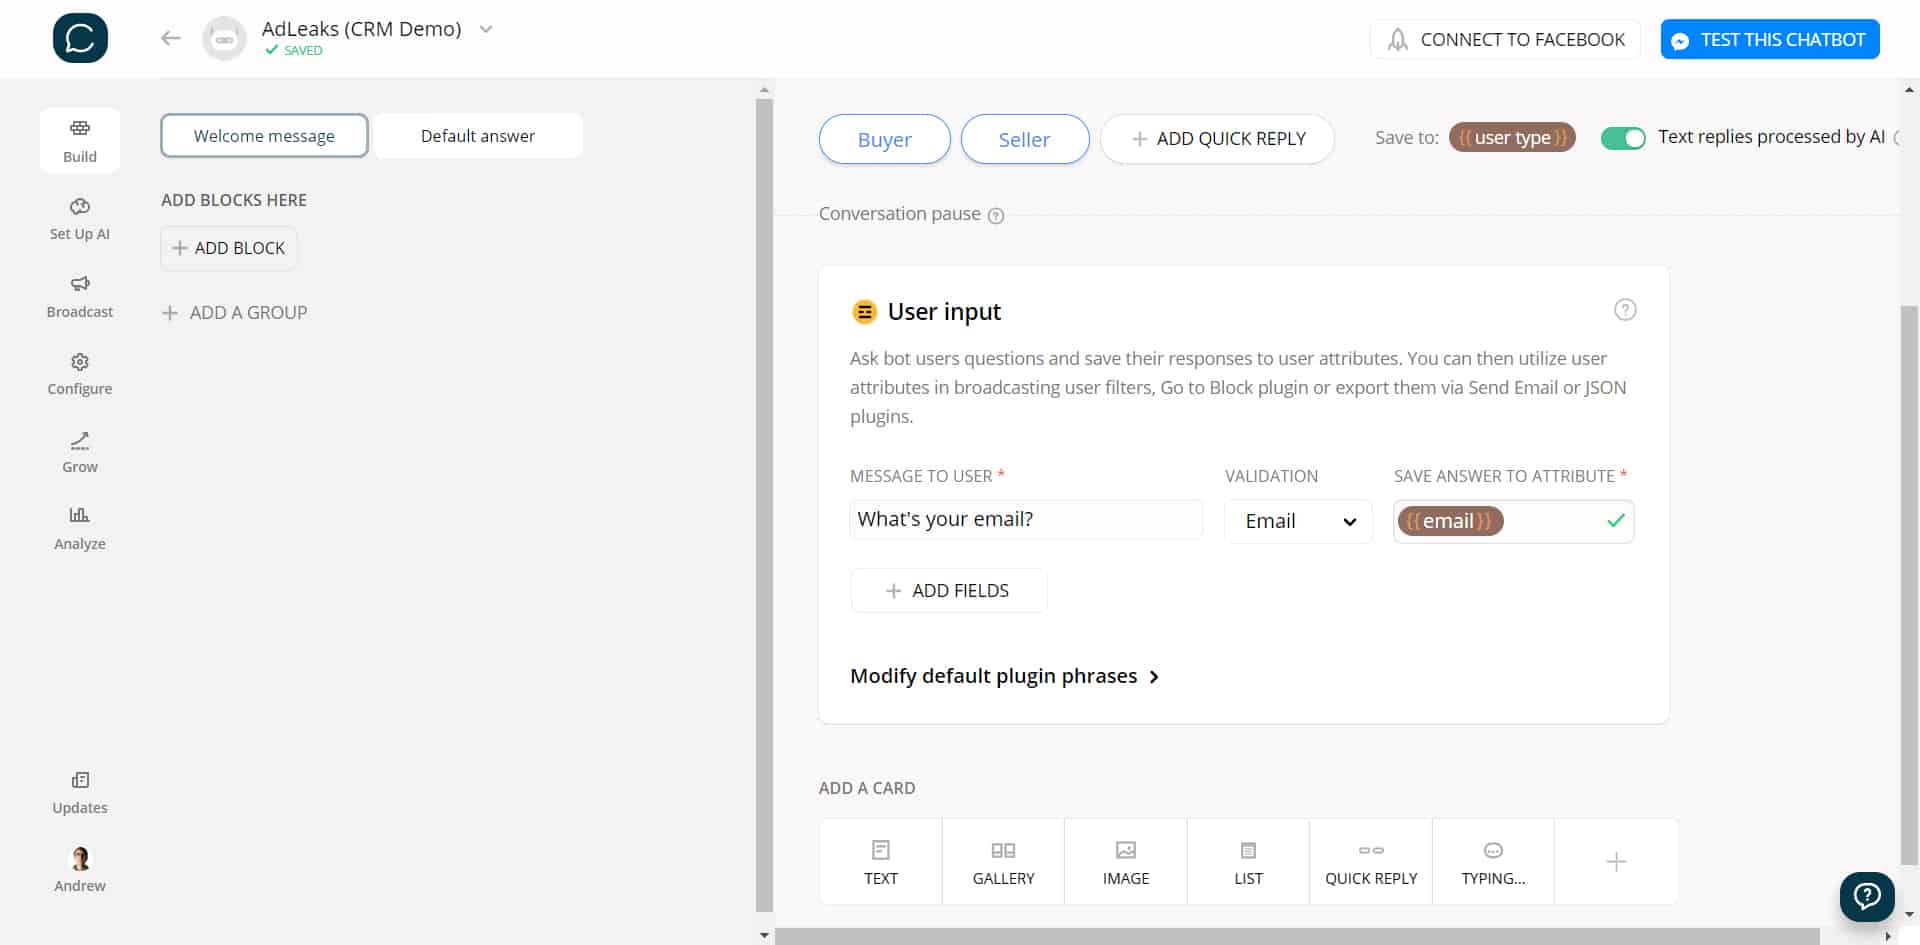
Then, after the user enters their email, I’ll send a “thank you” message to confirm everything worked correctly.
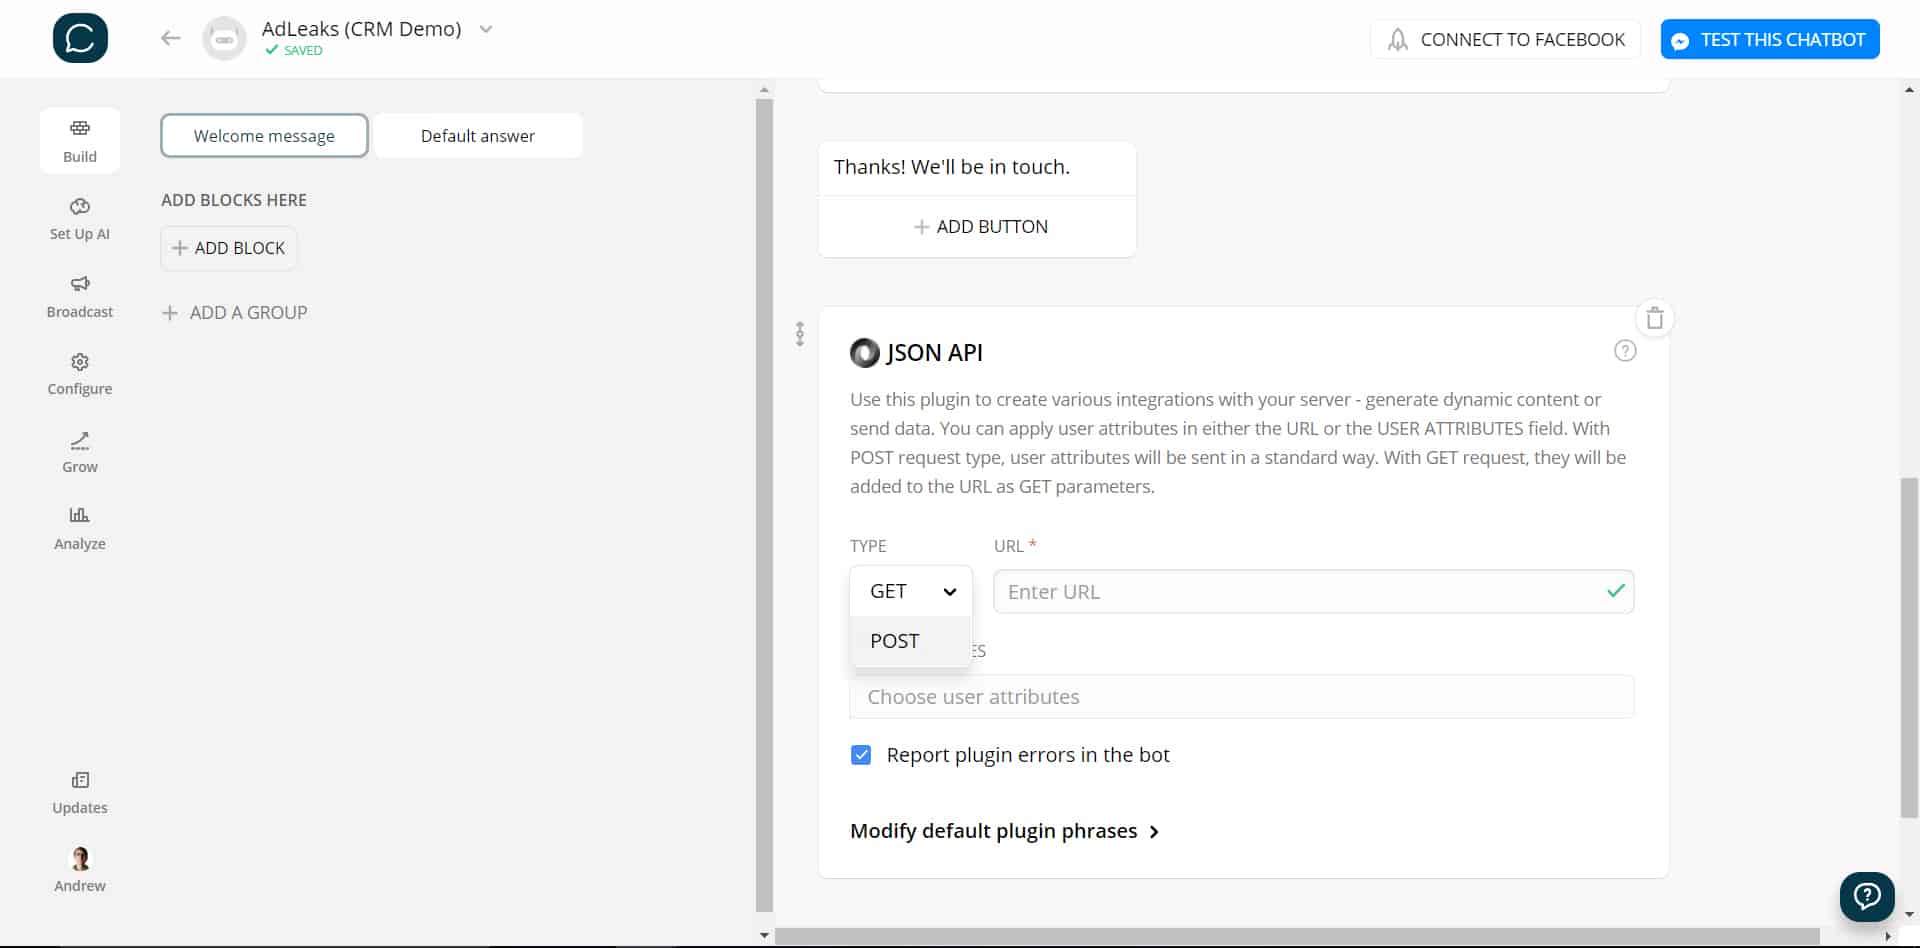
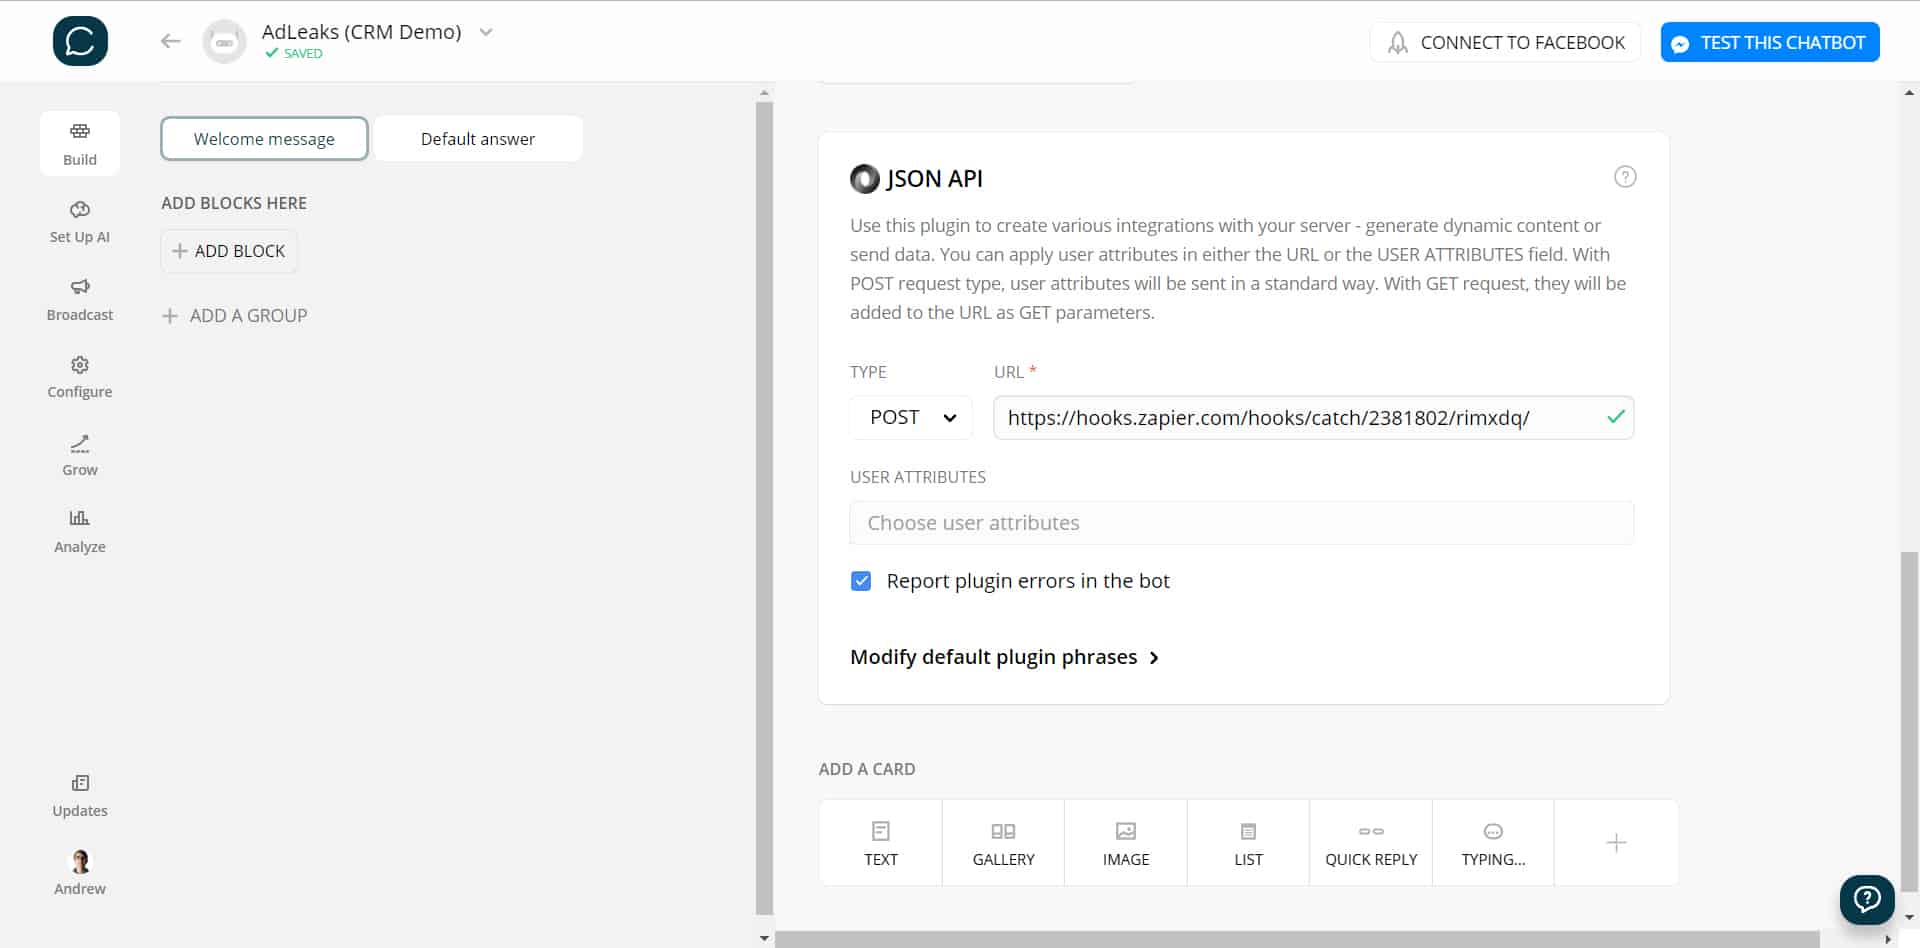
But here’s the most important step: adding a JSON API plugin.
For now, just change the “TYPE” from GET to POST.
This JSON API ultimately acts as an intermediary, communicating data from your Messenger bot to Active Campaign (or whatever CRM you’re using).
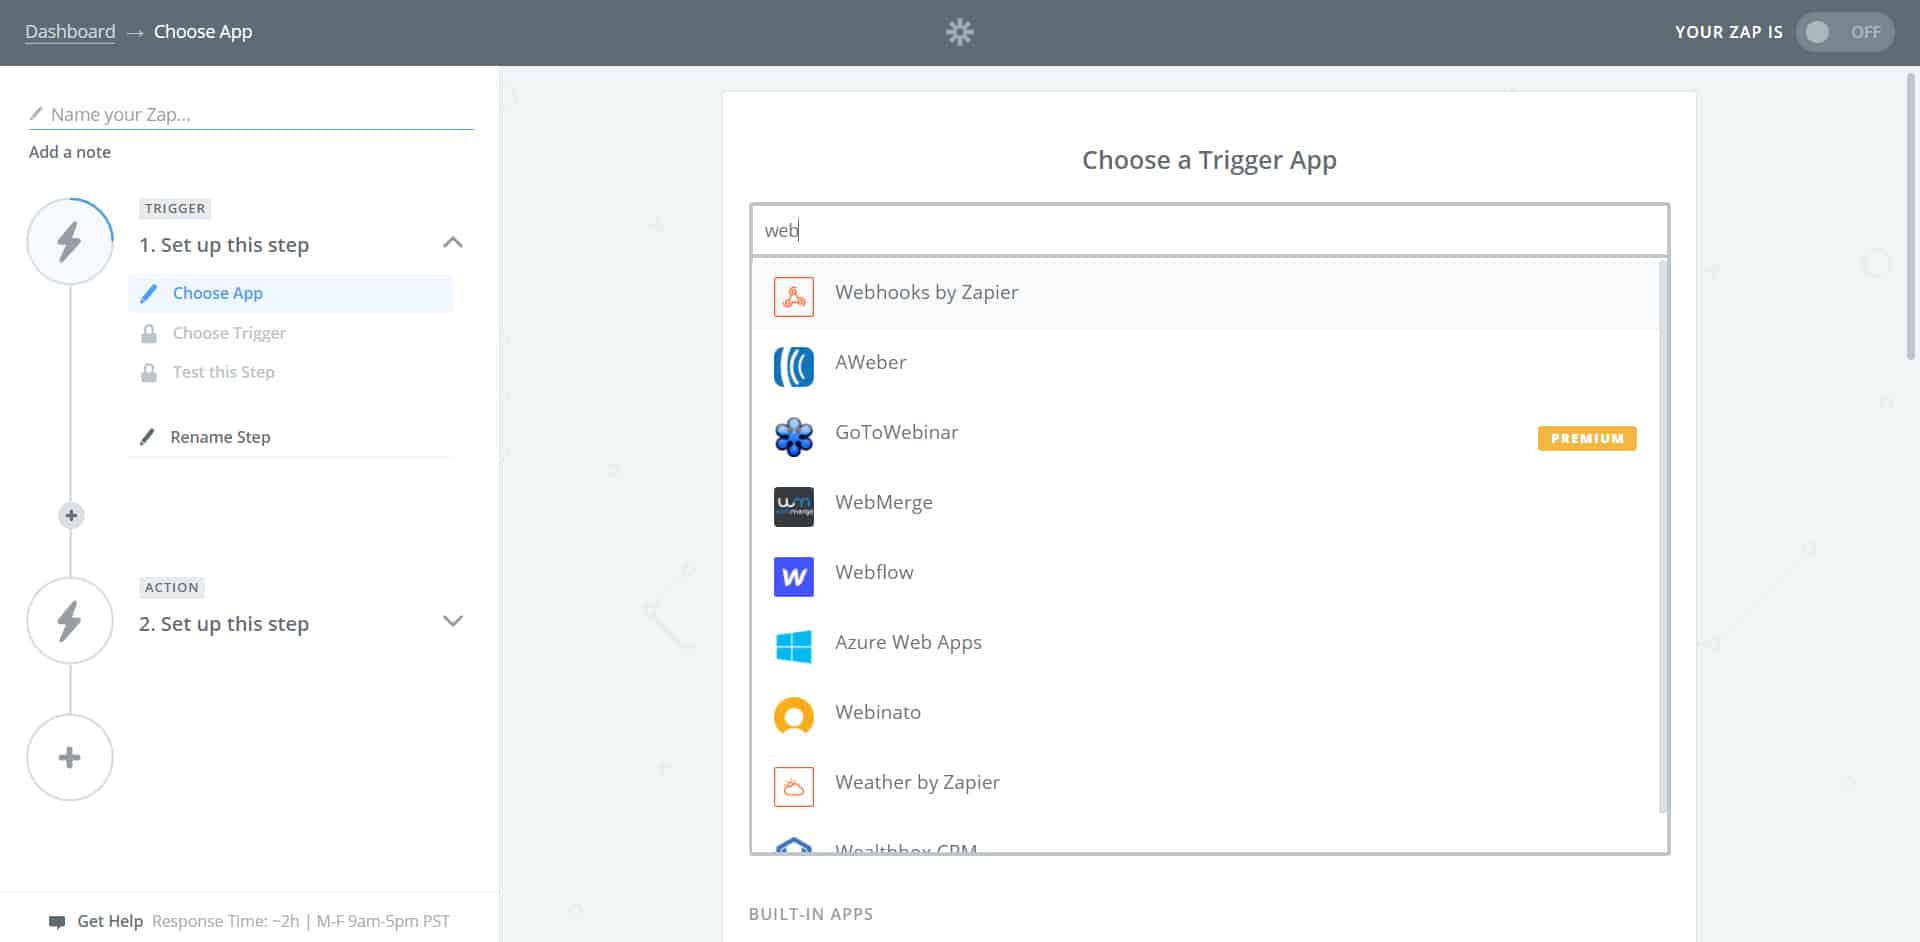
Step #2: Set up a catch hook in Zapier
Next, we need to tell our bot where to send the information it just gathered. (Imagine ordering something on Amazon, but not providing your shipping address – good luck!)
This is where Zapier comes in…
Click the big, orange “MAKE A ZAP!” button and search for “webhook” as the trigger.
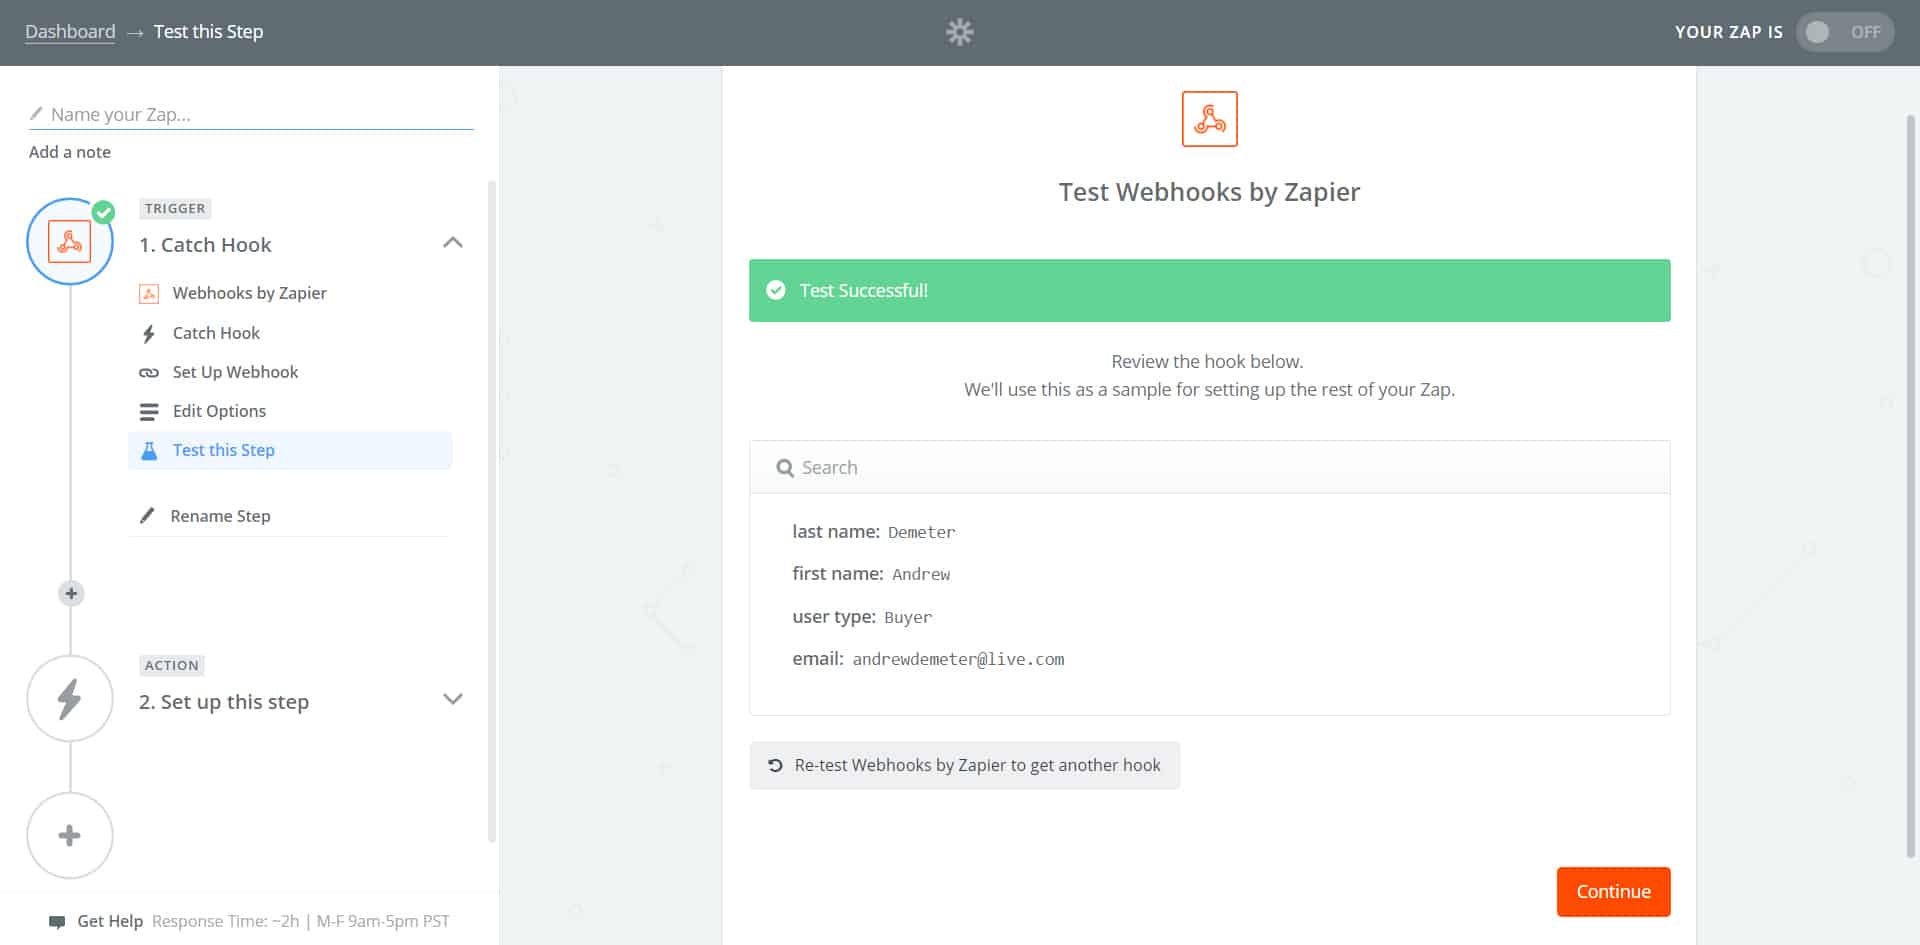
Select CATCH HOOK.
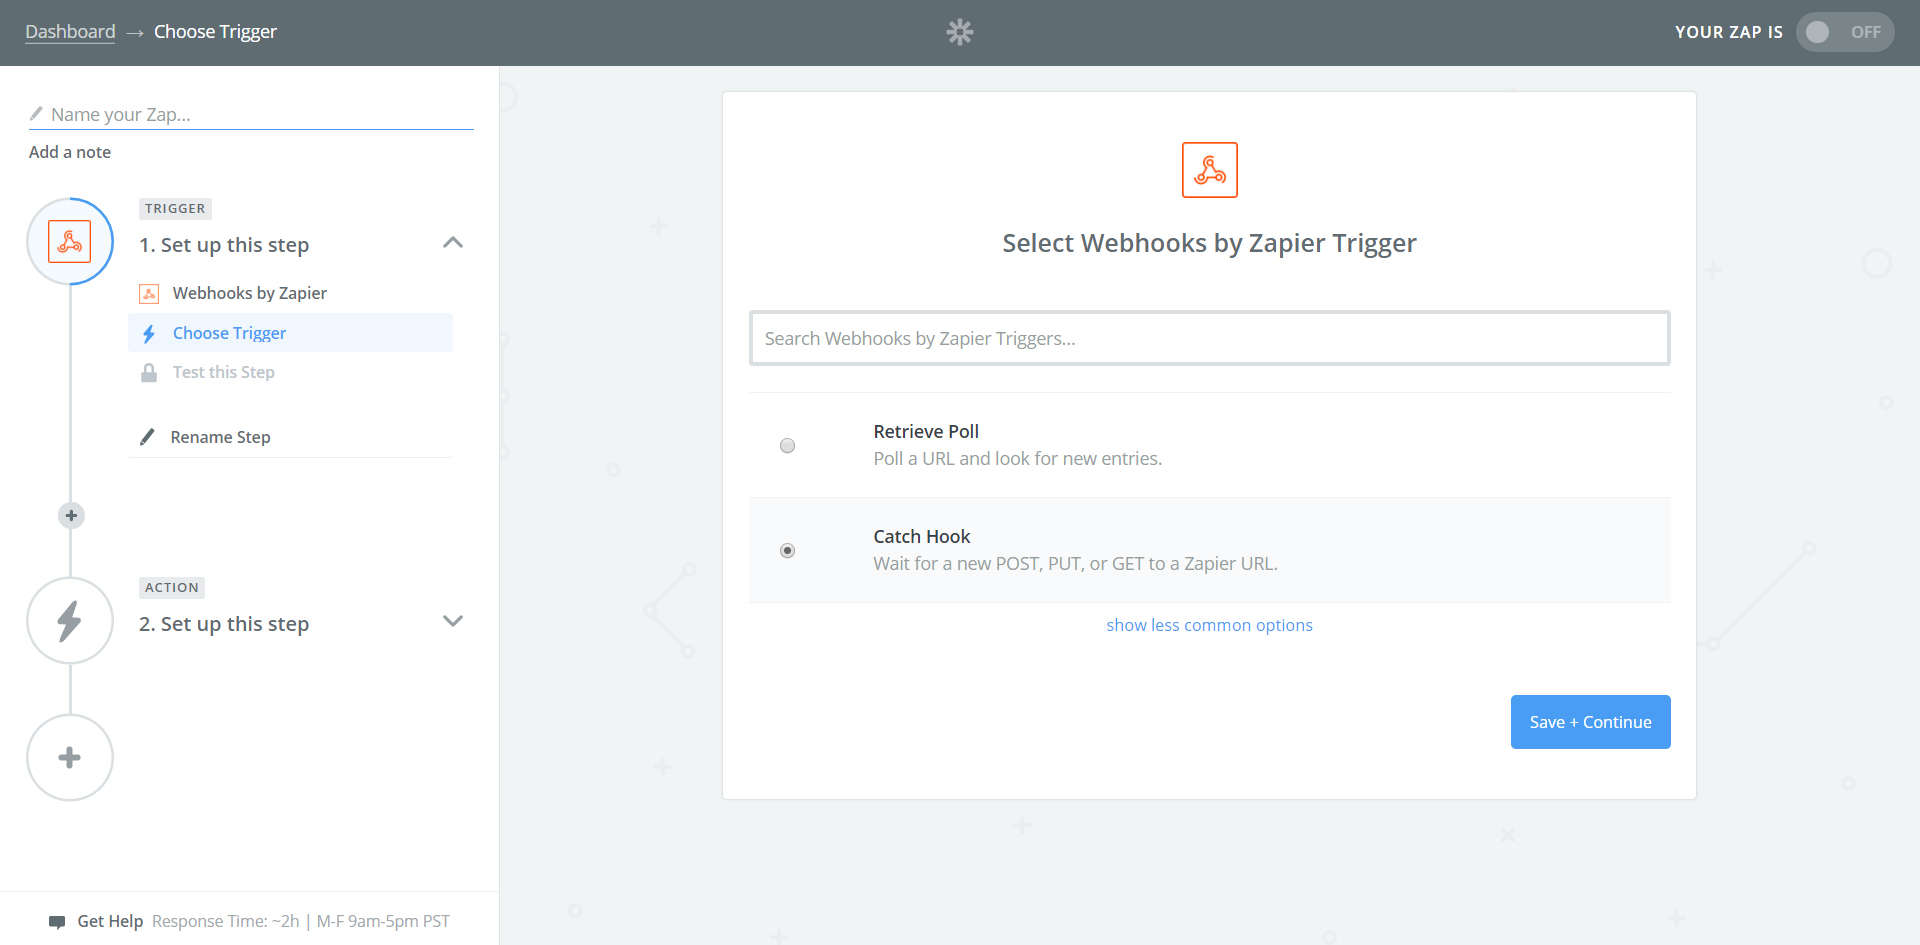
Leave the “Pick off a Child Key” field empty. Click CONTINUE.
Copy the webhook URL that Zapier generates for you.
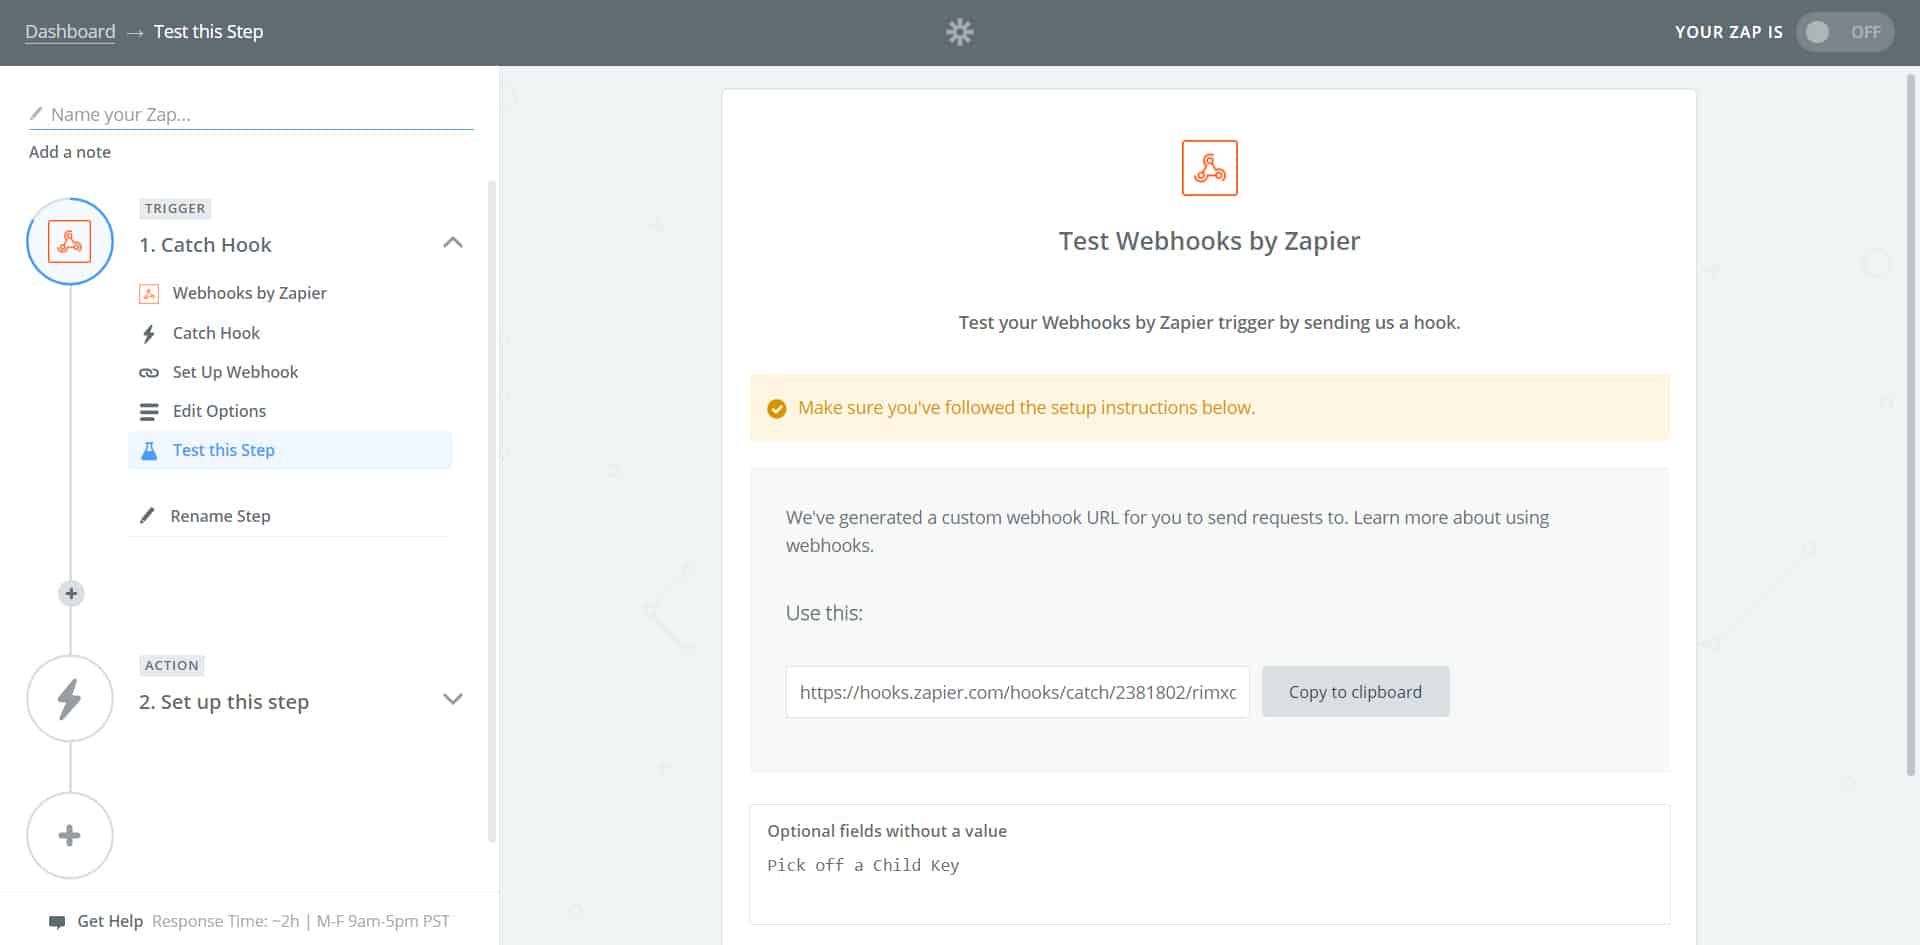
Then let’s head back into Chatfuel, pasting the URL we just copied into the JSON URL field.
Step #3: Attach user attributes to JSON API
Under the USER ATTRIBUTES heading of the JSON API plugin, enter all the data values from your Messenger bot that you wish to send to your CRM.
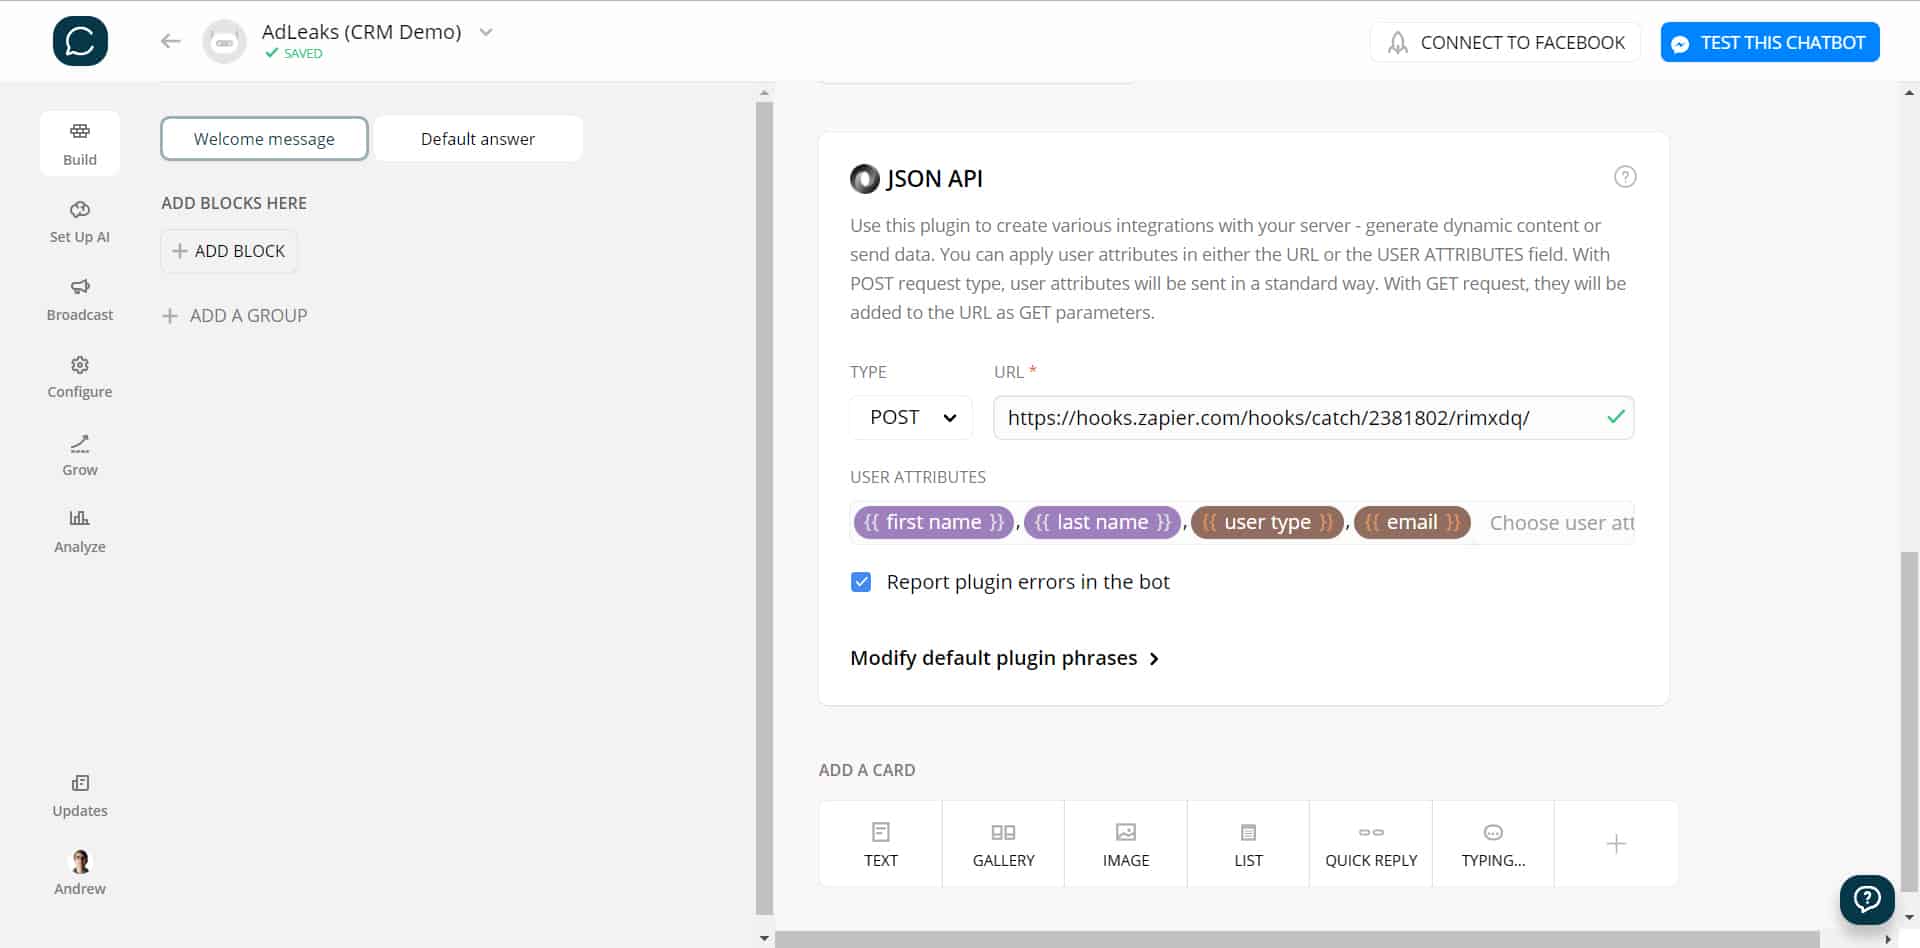
In this example, I’m attaching Chatfuel’s built-in {{first name}} and {{last name}} user attributes to identify each unique user.
I’m also passing through the {{user type}} attribute, which I connected to the buyer/seller quick replies, and {{email}}.
Step #4: Push test data to Zapier
After attaching user attributes to the JSON API plugin, we’ll need to test and confirm that the data is passing through from our Messenger bot to Zapier and then to Active Campaign.
To do this, click the blue TEST THIS CHATBOT button in Chatfuel.
Go through the user flow you designed in Step #1, entering the necessary data.
Once you’ve completed the process, switch back to Zapier and click “OK, I did this.” If everything works as planned, Zapier will fetch your data and proclaim: “Test Successful!”
Step #5: Connect to Active Campaign
Now that Zapier has the data, just like in Chatfuel, we need to tell it where to send that information. (Hint: Active Campaign!)
Click CONTINUE to advance to Step 2 of the Zap, then search for the Active Campaign app.
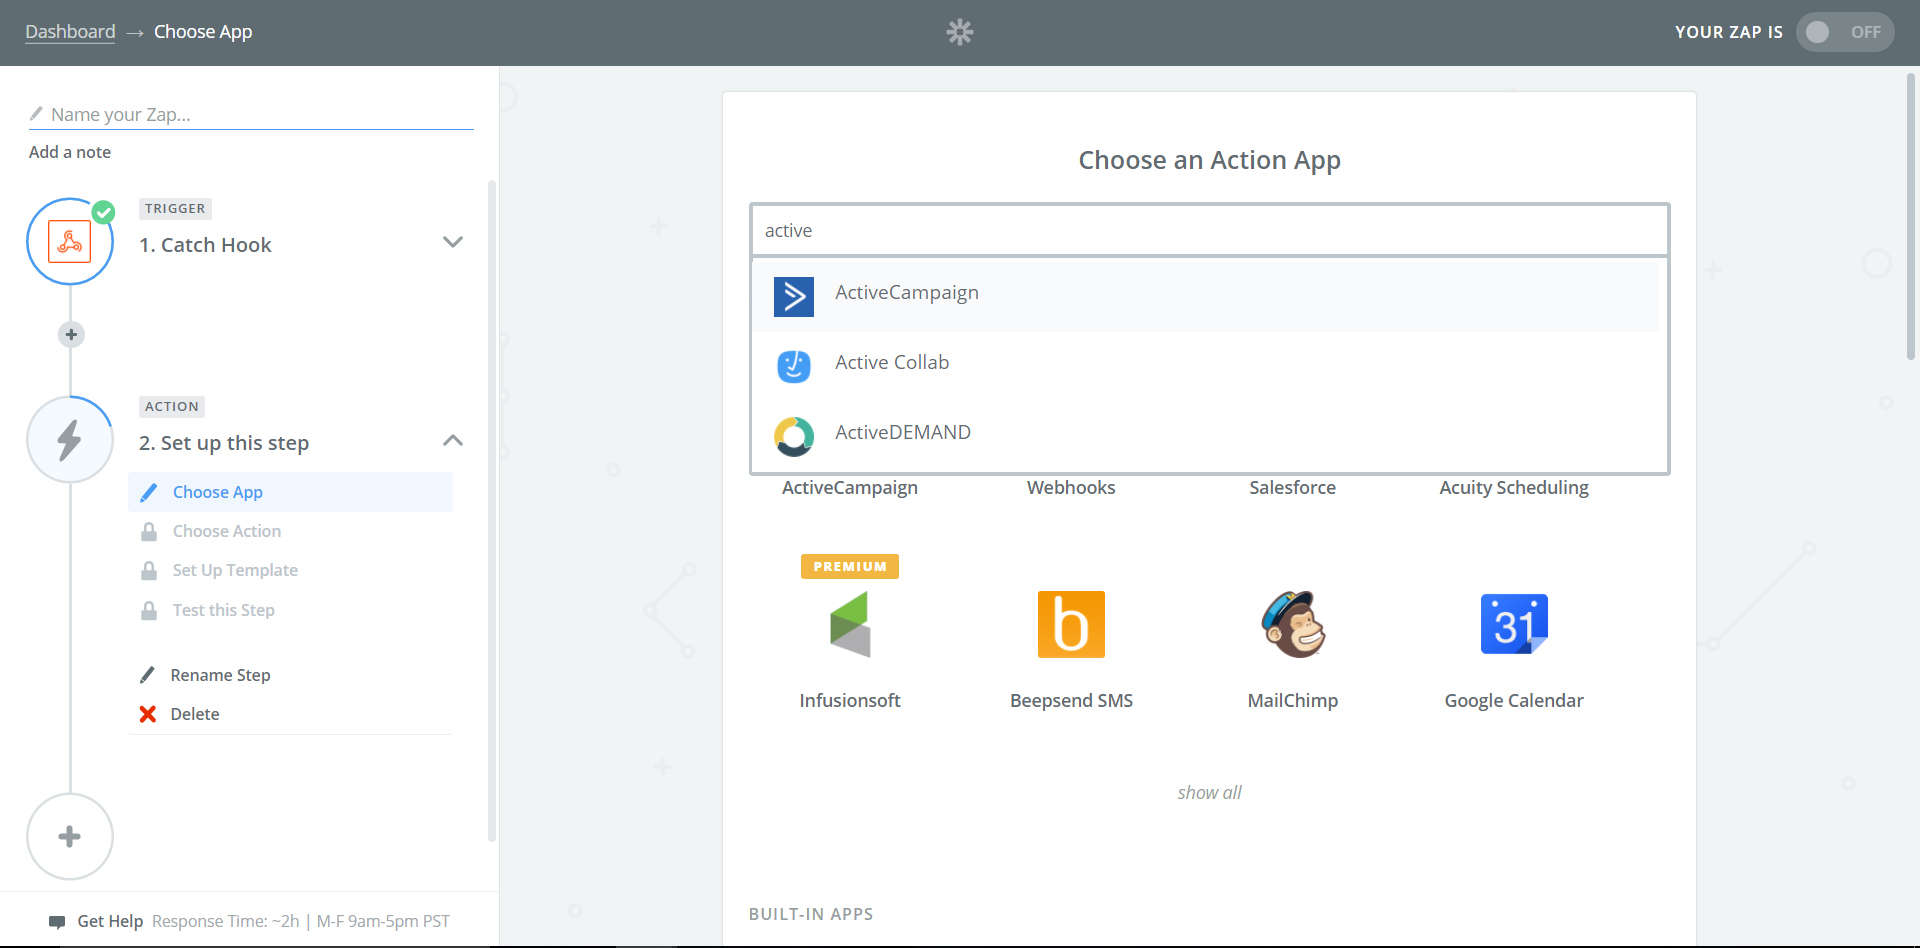
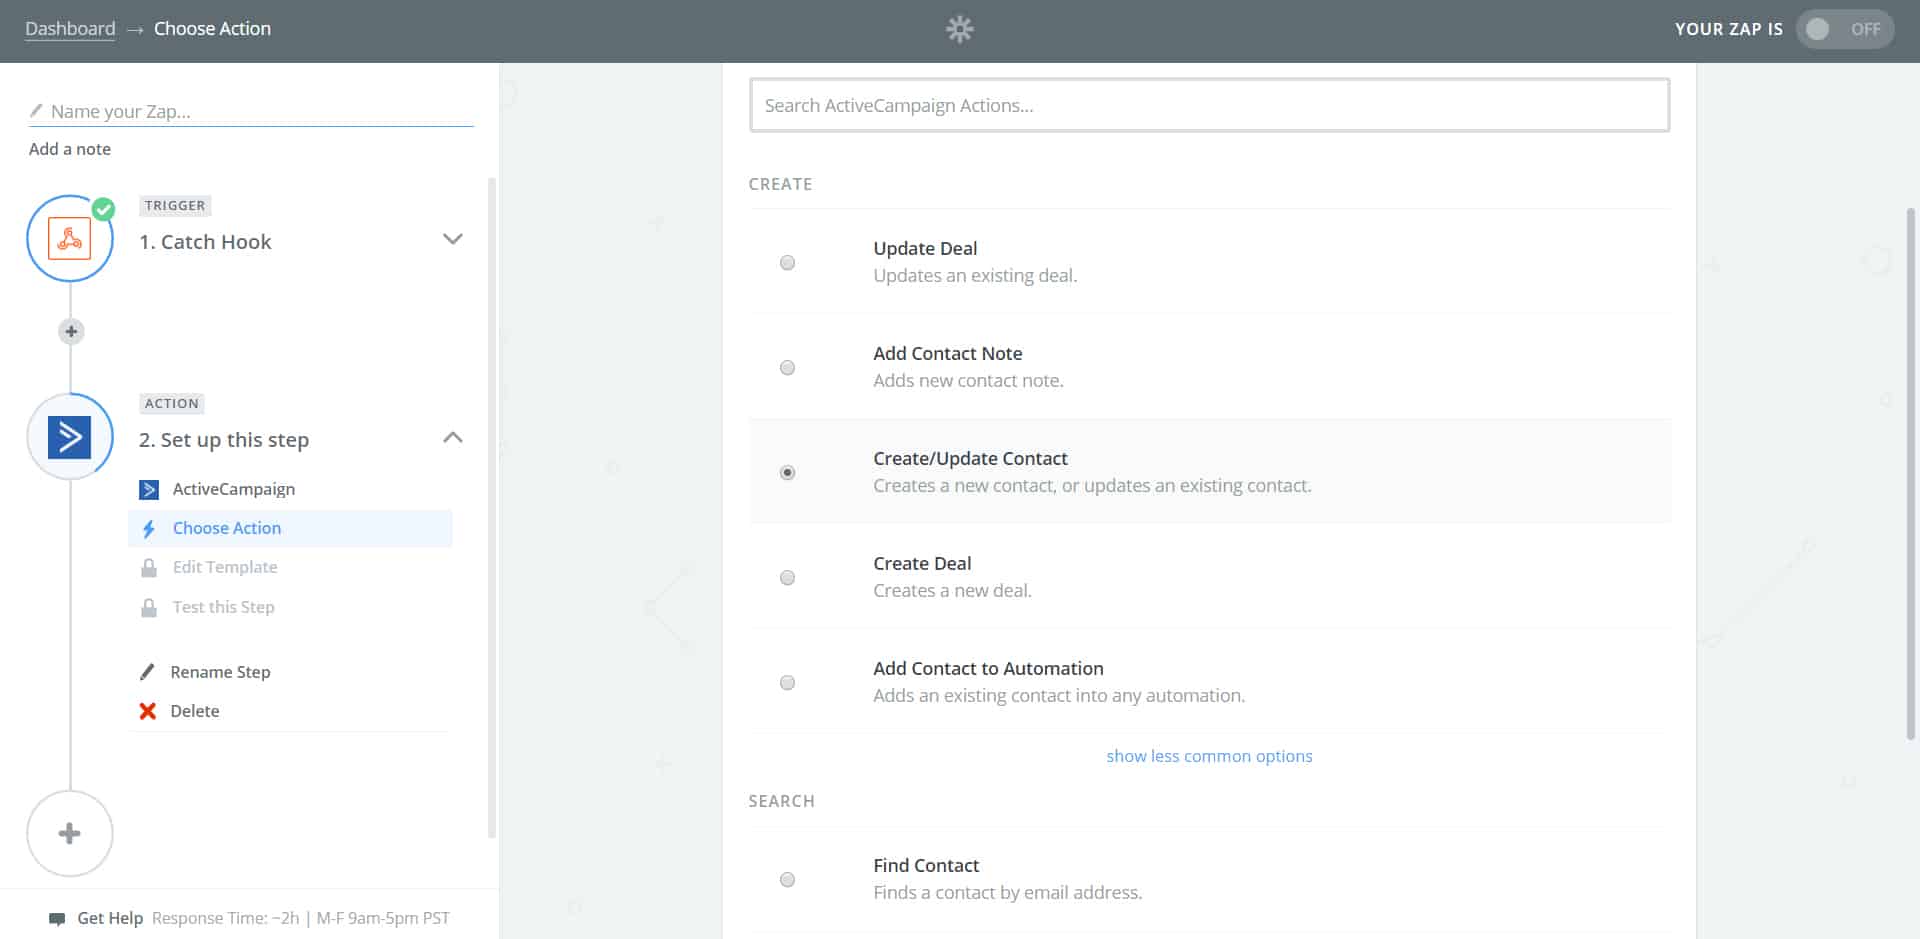
Select “Create/Update Contact” for the action.
Then click “Connect an Account,” which will open this pop-up window.
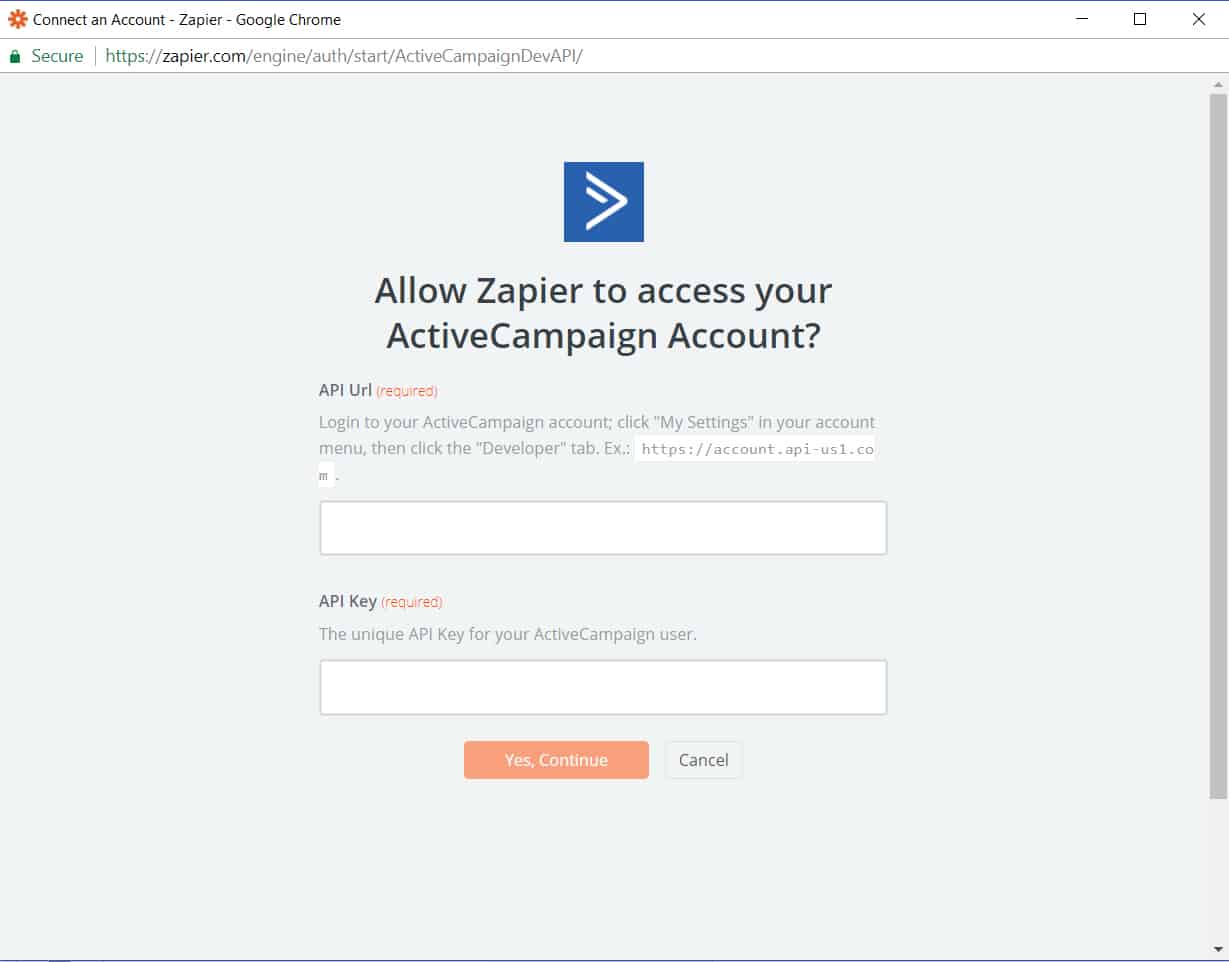
(Yes, I know this looks intimidating – but fear not!)
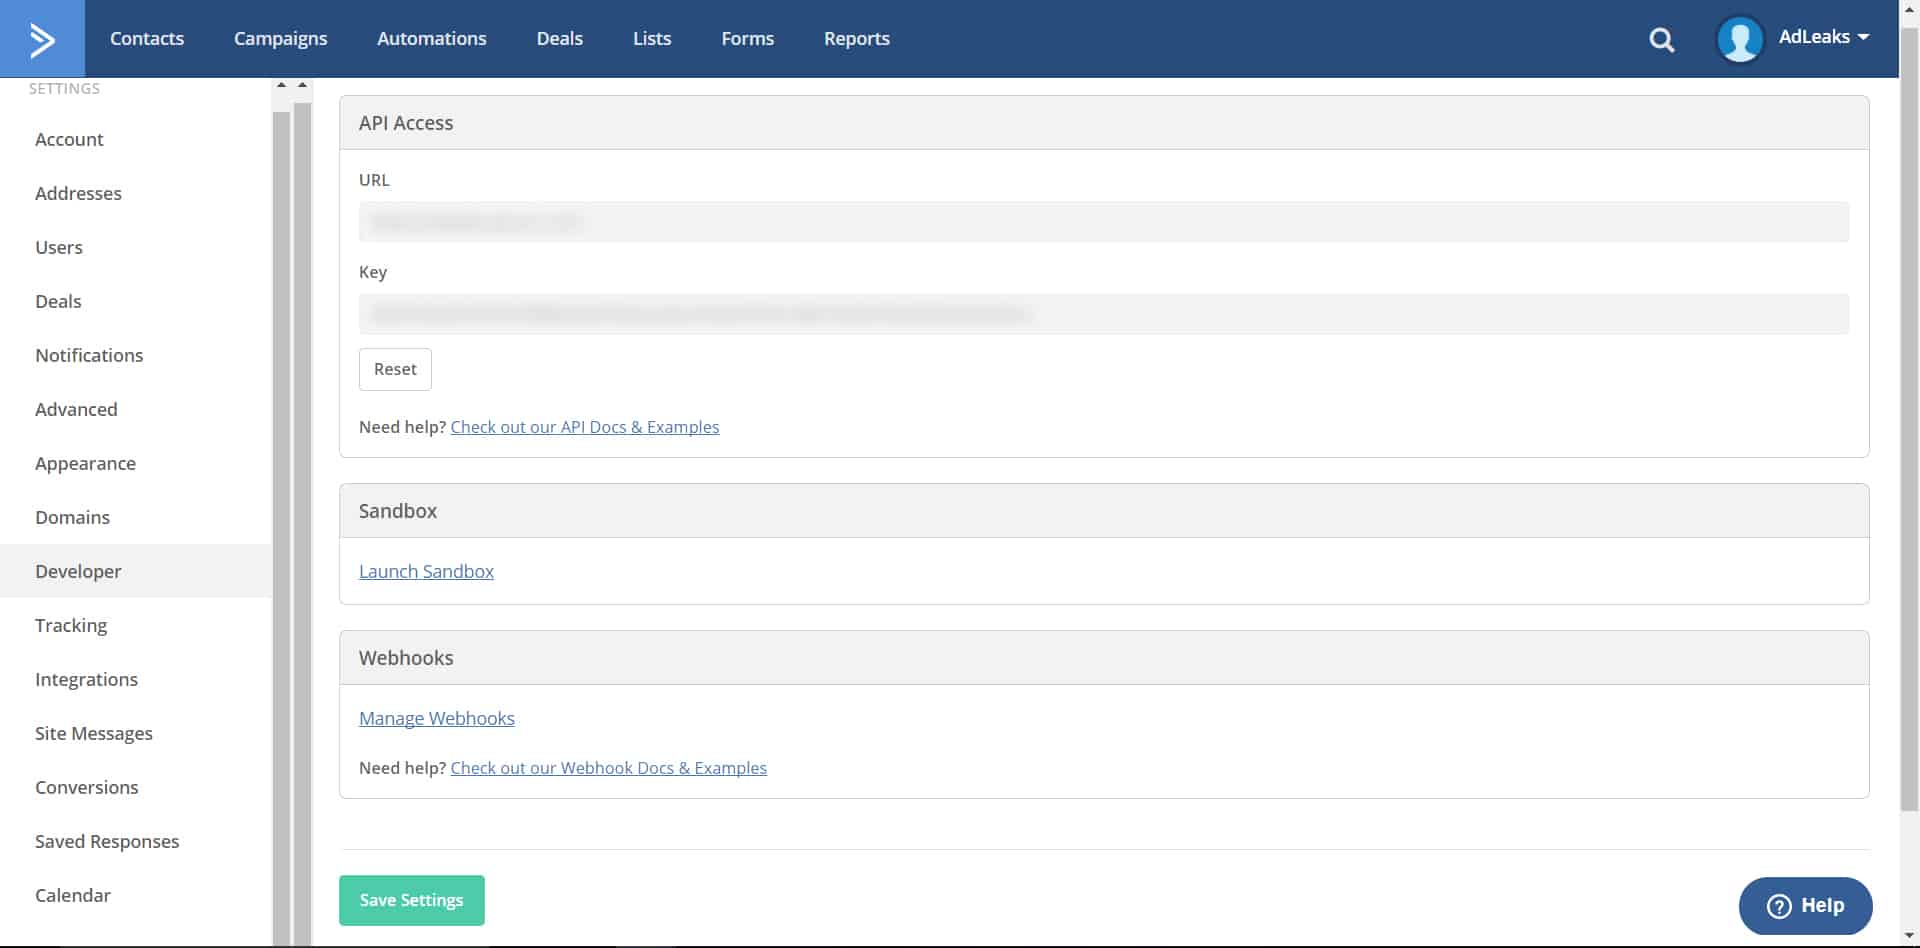
To find your API URL and API Key, look under “My Settings” --> “Developer” in your Active Campaign dashboard.
Step #6: Fill Active Campaign fields with user attributes
Once your Active Campaign account is connected to Zapier, select the subscriber list you’d like to use.
Repeat this process for each relevant field below, but using the data populated from the Catch Hook in Step 1 of your Zap.
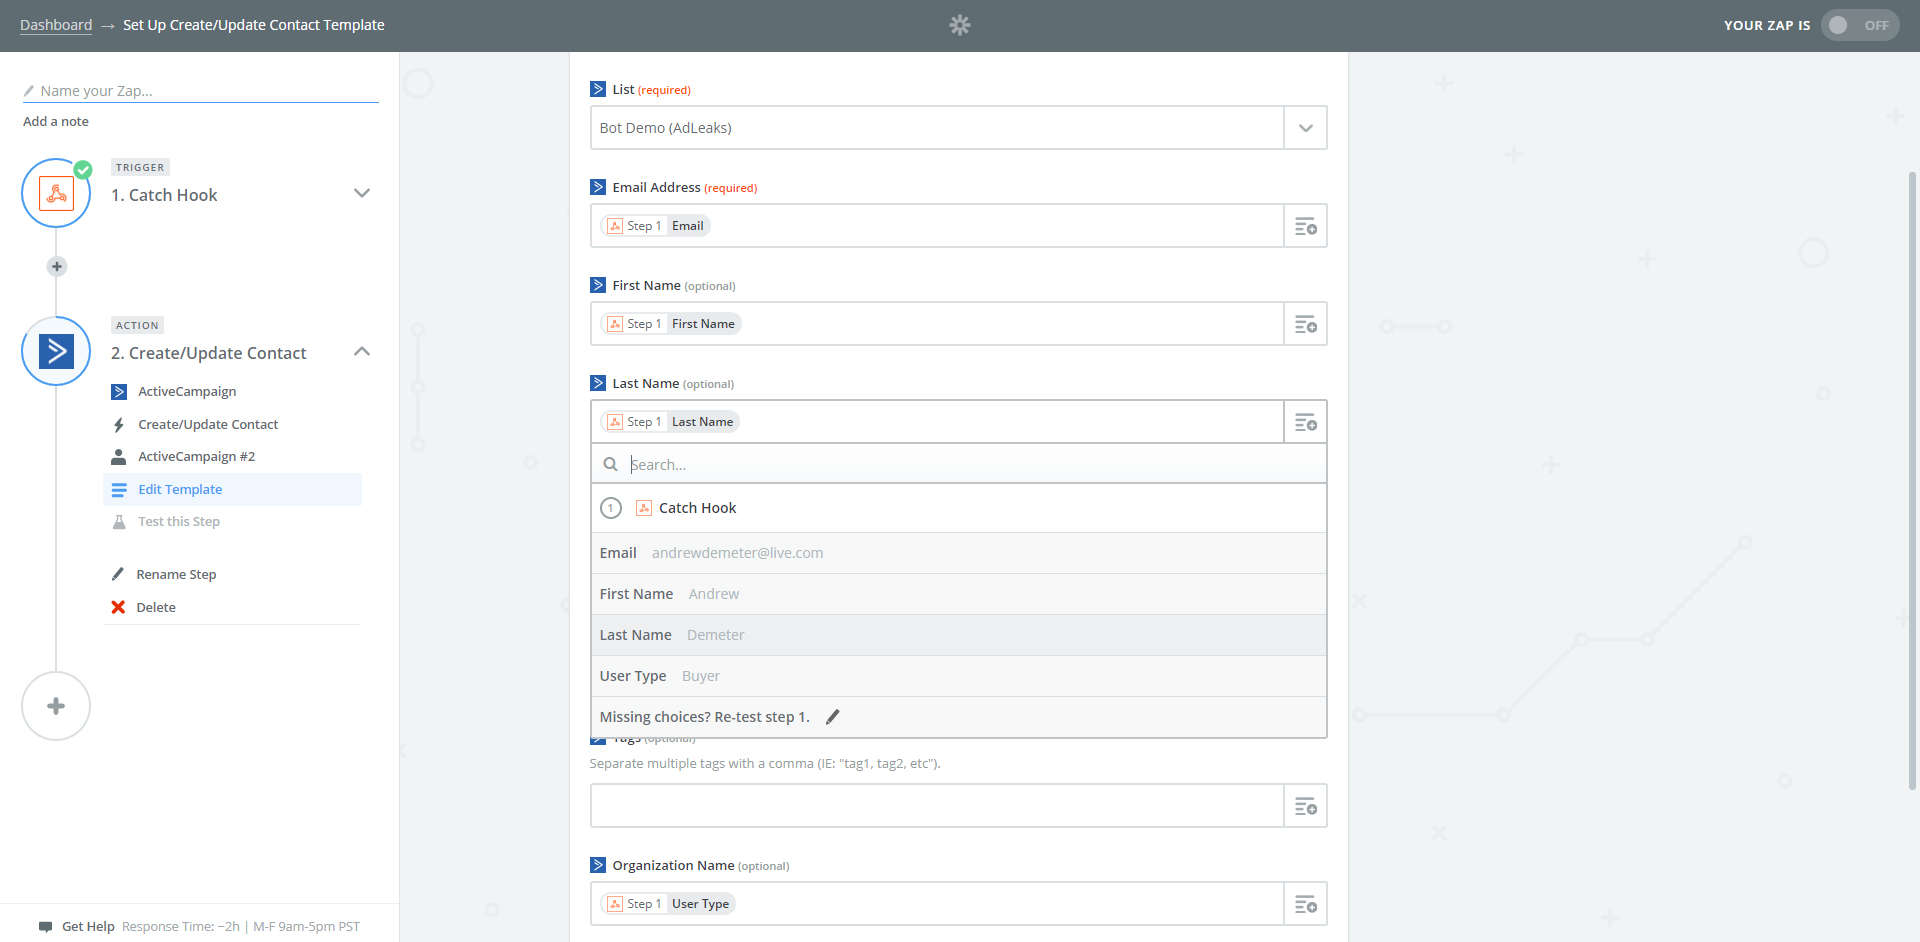
Continue until you see the “Test Successful!” message again.

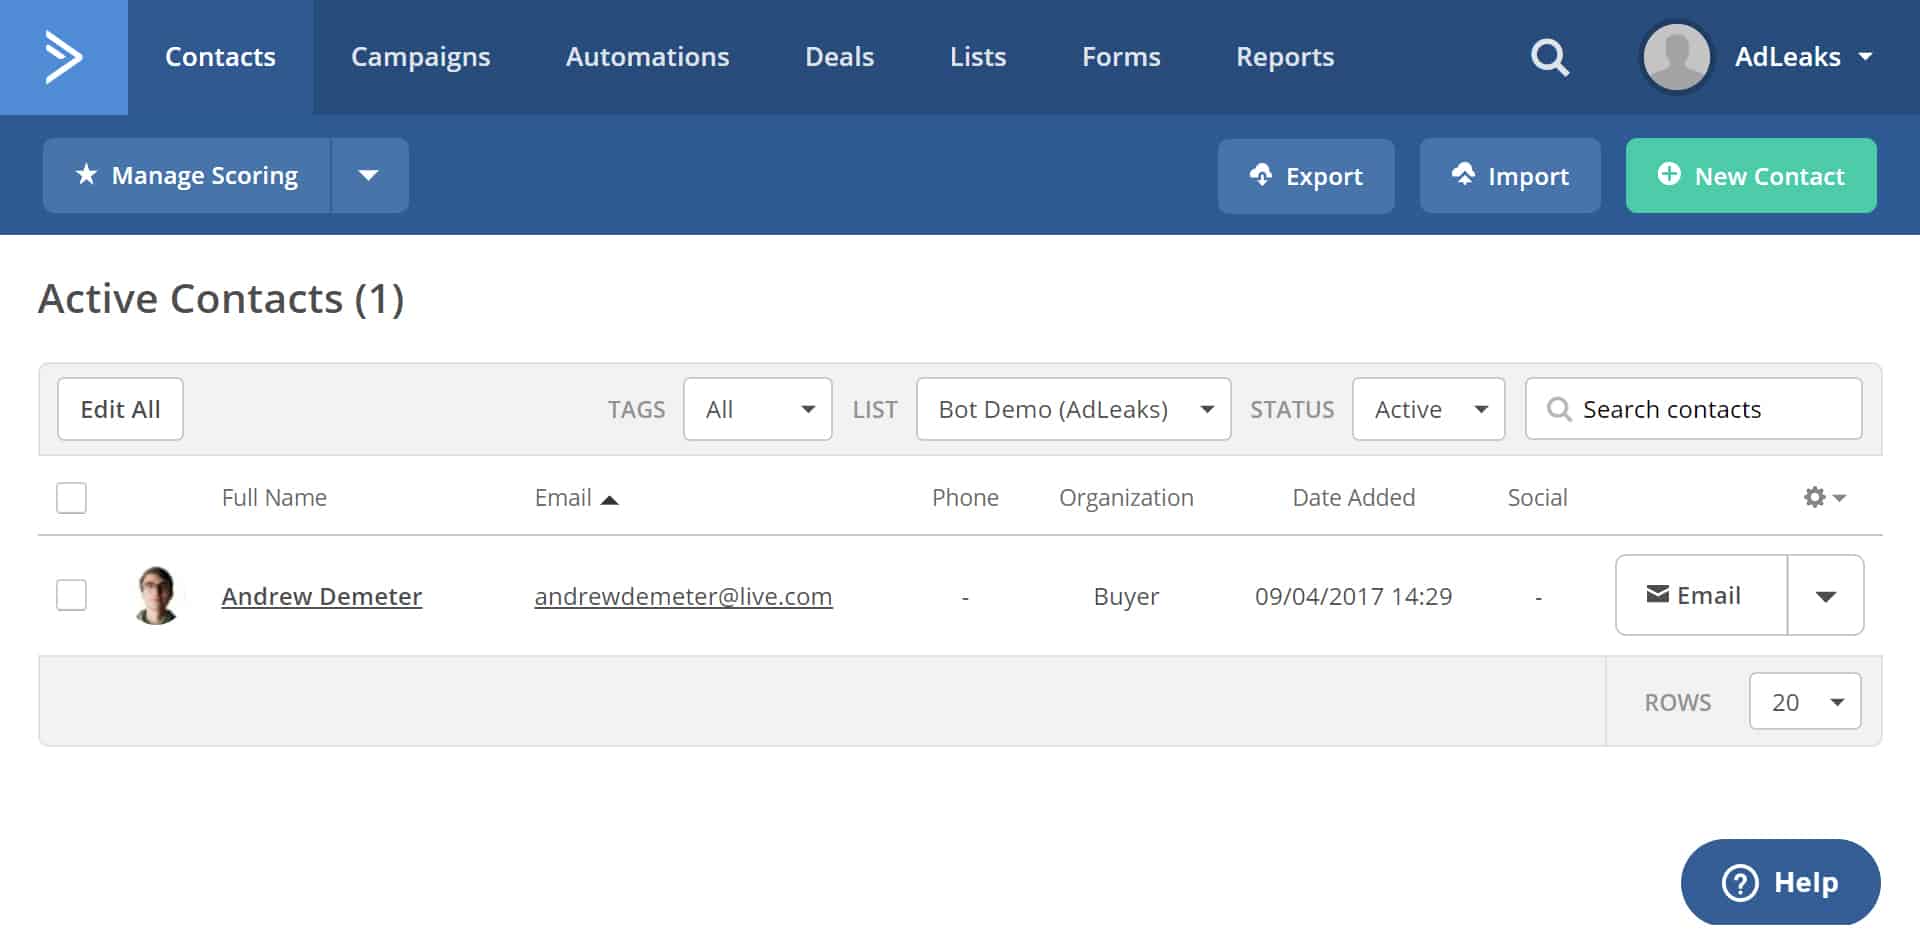
Step #7: Trust, but verify!
Confirm that your sample data was successfully pushed to your Active Campaign list.
Step #8: Activate the Zap
After you’ve confirmed that everything worked, go back into Zapier and turn on the Zap.
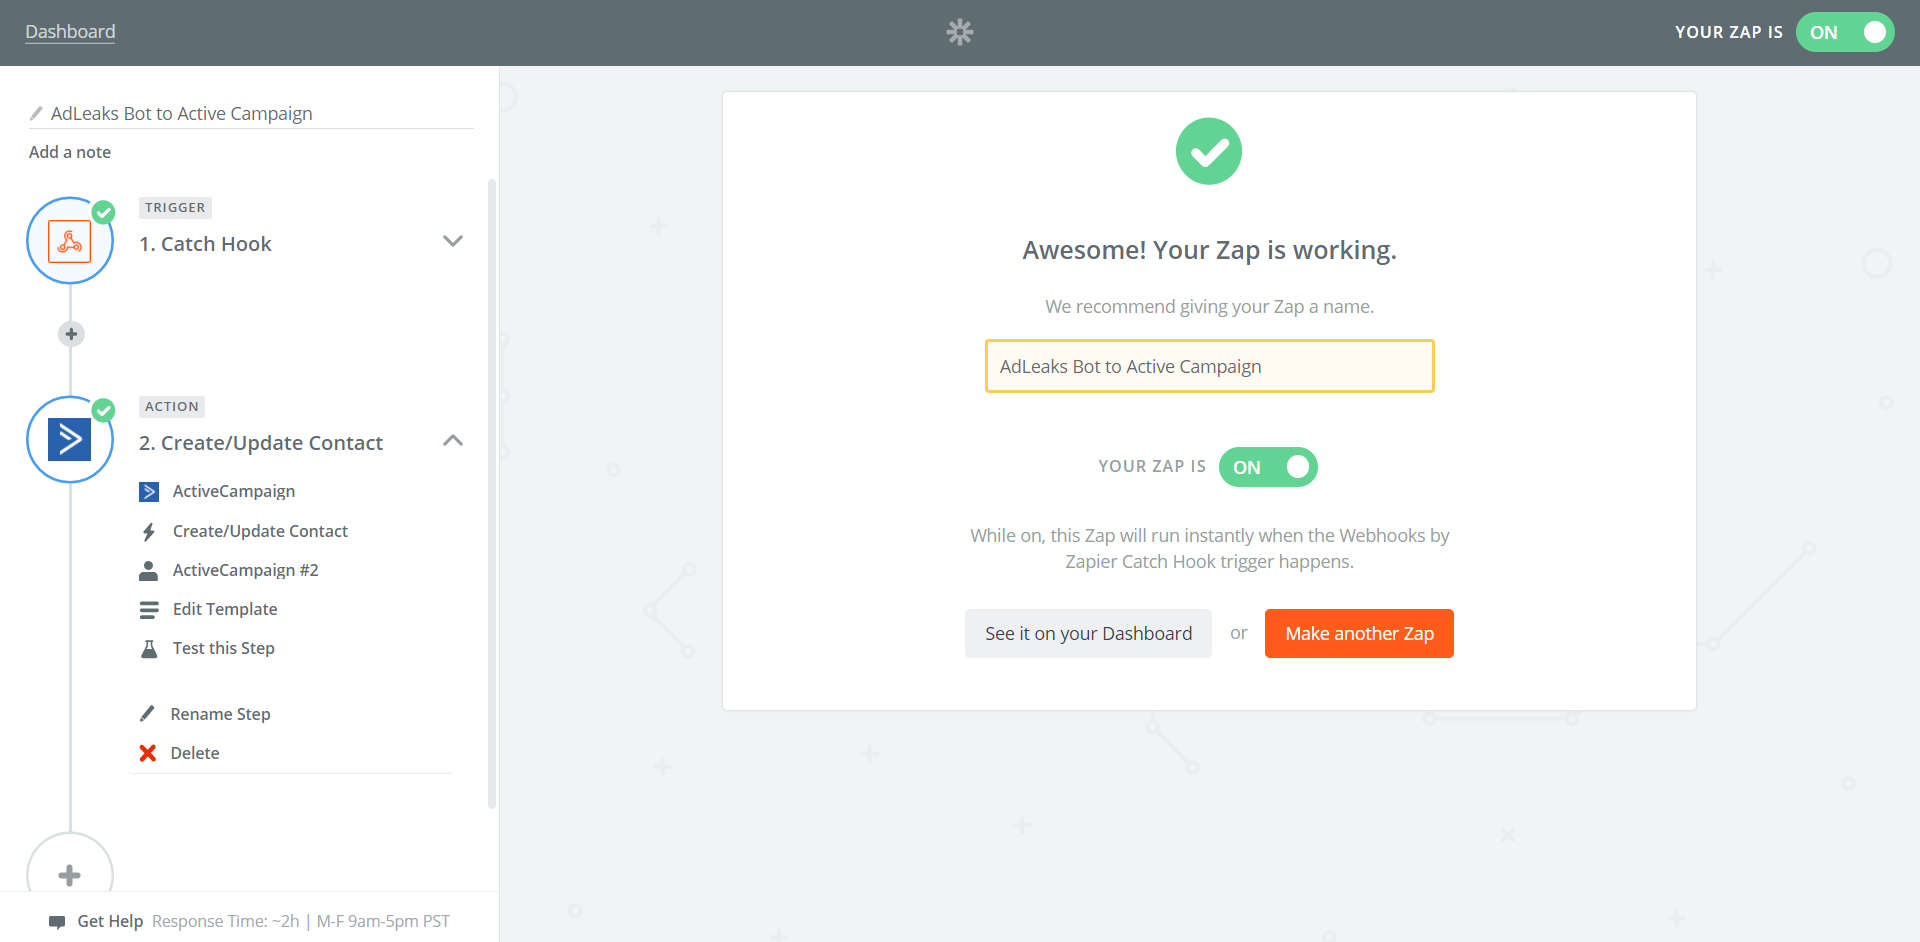
This will activate the Active Campaign Zap for all users on your Messenger bot.
Conclusion
Integrating a Messenger bot with your CRM is invaluable.
Instead of asking potential leads for their first and last name, which decreases conversion rates, you can expedite the process by automatically importing that data from their Facebook profile.
Better yet, bots enable you to send highly-segmented messages to your “subscribers” (and get 60-100% open rates!) without spending a dime on Facebook Ads.
So if Messenger bots are so great, is email even worth it?


Related Posts:

